I recently purchased a new iMac and I was wondering how I can film a video using the camera built into my iMac that can be posted on YouTube/Myspace and watched by viewers everywhere. -From Yahoo Answer
People decide to record video footage from their Macbook/iMac camera for a variety of reasons. Some people want to record a video to have on hand; record a presentation to use at a later date; share touching moments with friends and family; or put the video up on websites as mentioned above.
Table of Contents
- Solution 1. Record Mac Video with Sound Using Solid Mac Video Recorder Software
- Solution 2. Free Capture Video on Webcam with Photo Booth
- Solution 3. Free Record Mac Video with QuickTime Player
- Solution 4. Online Record a Video of Yourself on Mac with cam-recorder.com
- Solution 5. Capture Video from iMac MacBook Camera with cameratag.com
- Solution 6. Record Video on Mac with Apple Built-in Camera
Solution 1. Record Mac Video with Sound Using Solid Mac Video Recorder
There are a large amount of video recording software that have been designed for recording a video using a webcam. Among them is MacX Video Converter Pro, which owns the power to record video using Mac's built-in camera (or external connected camera) with audio sound and convert the recorded video to various formats for sharing to YouTube/Ins, a blog or on popular devices like iPhone, iPad 7, iPad Mini 4, PS5, Samsung Galaxy S21, Google Android, Sony, Xbox One, etc.
The exported Mac video recording file can achieve up to 4K 2160p high definition and the corresponding parameters like frame rate, bit rate, aspect ratio and video profile can also be adjusted later within this toolkit. Give you maximum freedom over your Mac recording in quality, file size, video codec and playback size.
How to Record Video from iMac/Macbook with High Definition Quality
Free download this video screen recording on iMac or MacBook. After the download is finished, run the video capturing software for Mac and follow the wizard instructions.
Step 1: Hit the Record icon on the main interface, the video recorder window will pop up.
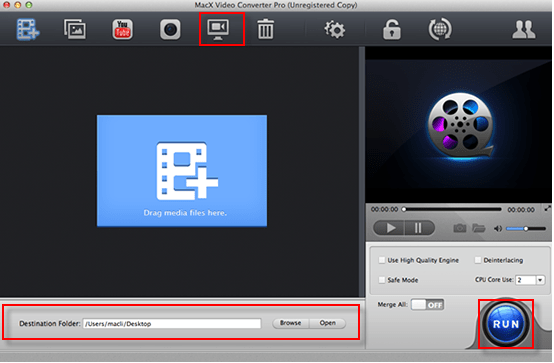
Step 2: Click "Setting" button to choose the devices for video and audio recording.
Step 3: Select a destination folder to save your recorded video by clicking "Browse" button.
Step 4: After finishing the steps above, press "Start Record" button to capture Roblox gameplay video on iMac/MacBook Pro. You can stop the video recording process at any time.
You can also edit the video as you like, such as trim video clips, crop the video size, merge video files, add watermark and load an external subtitle file (.ssa, .ass, .srt) to personalize your recorded video.
Solution 2. Free Capture Video on Webcam with Photo Booth
Photo Booth is a must-mention if easiness does matter a lot to you. It executes the Mac video capturing task in a manner that is even much easier than the professional Mac video recorder or QuickTime player, just couples of mouse clicks, no extra settings or tests needed. Here's how to use it to capture a video on a Mac.
Step 1: Fire up the Photo Booth app from the Applications folder on your 2022 Mac Studio, MacBook or iMac.
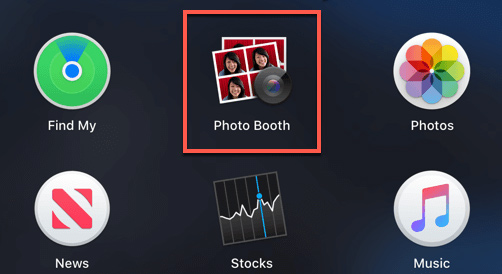
Step 2: Tap the Record a movie clip icon (it looks like a film reel) in the lower left-hand corner of the panel.

Step 3: Hit the red Record button in the center of the screen to call the webcam recording begin. Press it again to stop recording on MacBook, iMac or Mac Studio.
Step 4: Thumbnail pictures show up under the main picture. These thumbnail images represent the videos or photos you took with Photo Booth app. Choose the one you wanna export. The one you last recorded is on the right.
Click the Share icon in the lower-right corner of the window, then choose a sharing method if you wanna share your Mac recording file to social network platform.
Solution 3. Free Record Mac Video with QuickTime Player
QuickTime player stands you in good stead when it comes to free record a video on MacBook, iMac or Mac Studio with Apple's built-in camera or external camera. It allows you to free capture video on Mac in H264 video & AAC audio codecs or ProRes 422 video & PCM audio codecs. Two options are available for you grounded on your specific needs on output recording file quality.
Moreover, it even helps you free capture everything happening on your iPhone or iPad screen on Mac once your iPhone or iPad is connected to your MacBook, Mac Studio, iMac or Mac Mini. Feel interested? Check on the below tutorial to use it:
Step 1: Launch QuickTime player on your Mac via Applications folder.
Step 2: Head over to the menu bar > choose File > New Movie Recording. By default, this option opens the front-facing camera on the Mac.
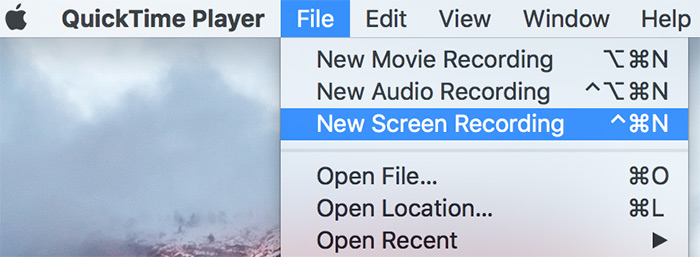
Optionally: click the arrow next to the the Record button button to change the recording settings:
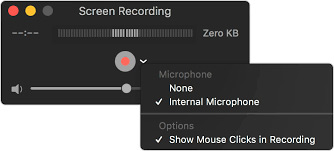
- To record your voice or other sound with QuickTime, choose a microphone.
- To monitor that audio during recording, move the volume slider (if there is audio feedback, lower down the volume or use headphones with a microphone).
- Opt for Show Mouse Clicks in Recording if you want a black circle around your pointer when tapping the recording button.
Step 3: Press the red Record button in the center of the screen to begin recording. Click anywhere on the Mac screen to begin recording the entire screen. Or drag to select a specific area to record, then click Start Recording within that appointed area. Click it a second time to stop recording.
Step 4: Go to the menu bar and select File > Save to save the recording. Or press Command-Control-Esc (Escape). You are prompted to give the recording a name and location to save it. Then, you can play your Mac recording video or upload it to YouTube or Instagram for sharing.
Solution 4. Online Record a Video of Yourself on Mac with cam-recorder.com
For those who need to film himself into the video using Mac camera, you're highly suggested to give the online video recorder a shot. cam-recorder.com is an awesome platform for you to online free record a video of yourself on Mac without much sweat.
Step 1: Visit cam-recorder.com official website.
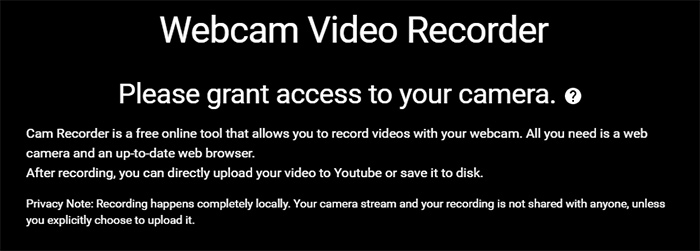
Step 2: Select a different webcam or mic option by clicking on the corresponding icons at the top right-hand corner.
Step 3: Hit the red Record button and this online video recorder service will instantly go into action.

Step 4: Tap Stop to end your video recording on Mac and share your video directly to YouTube or download it for editing at your disposal. This Mac online video capture service needs no extra set-ups. Once you have a browser and you can utilize it to record a video of yourself with a webcam.
Solution 5. Capture Video from iMac MacBook Camera with cameratag.com
cameratag.com, familiar? If not, okay, it's time to go closer to this powerful video recording website. This free online video recorder is specially designed for video recording lovers who would like to record video clips, upload DIY video to website for sharing and playback video on mobile device. And no matter you are a newbie or pro, you can easily master the key points of video recording, because it's just so easy to use.
- See, first of all, open this website and click on "See it in Action" button on the bottom of the record camera area.
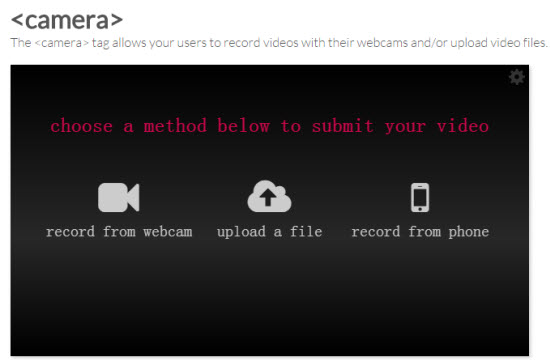
- Next, your're brought into a new page with three options for you: record from webcam; upload a file; record from a phone. of course, here we're supposed to choose record from webcam.
- Thirdly, this online video recorder will automatically detect the camera built-in your Mac or external webcam.
- Finally, you can begin to record HD video from MacBook Air or MacBook Pro with this free online video recorder once it sucessfully connects to your webcam.
Solution 6. Record Video on Mac with Apple Built-in Camera
You can record a video with your iSight or FaceTime HD camera (the built-in Apple cameras are not called webcams) by opening iMovie, Photo Booth, or QuickTime. The process is rather self-explanatory once those apps are open. Here I gonna show you how to use iMovie to record a video with iSight.
Step 1: Open iMovie, and click the camera button on the left side of the toolbar.(Or you can select File > Import From Camera or press Command-I.)
Step 2: Then iMovie will fire up a window called Import From: Built-In iSight. You'll see a preview of yourself--sit up straight, press the Capture button, name your new Event, and once again hit on Capture button.
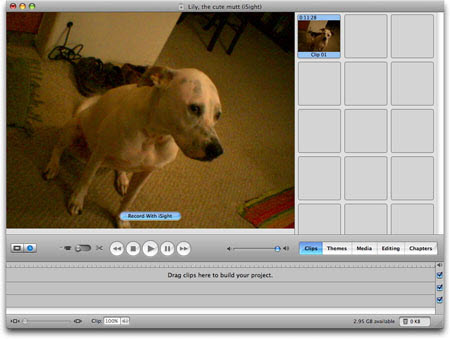
Step 3: Followed by Stop button if you have finished your video recording.
Step 4: Find out your recording video clips in the Event Library at the bottom of the screen. You can open to watch it or import to iMovie to edit this video clips.


