As videos are developing toward 4K, 5K and even 8K, we are facing with growing chanllenges of video size explosion.
- A minute of 4K video @60fps recoded by iPhone X: 200MB in HEVC and 400MB in H.264;
- A minute of 4K video @60fps shot by GoPro Hero6 Black: 600MB in HEVC;
- A minute of 1080P video @25fps exported from Premiere Pro CC: about 1.65GB in Apple Prores422;
- A minute of a RED 4K FF(6:1) video @24fps: 1.1GB; a minute of Phantom Flex 4K Raw video @24fps: 25GB.
The sizes of modern videos are way too big. You will see them too big to get uploaded to social, transferred to mobiles, sent via emails, etc. Why? Because there are size limits on your favorite services. On FaceBook, only 4GB is allowed. WhatsApp allows pitiful 16MB. The limits of other email services range from 20MB to 10 GB... In most cases, we need to reduce the video size. But how? Learn ways to compress video file size on Mac by up to 97% without losing perceptible quality loss.

Best Video Size Reducer for Mac to Make Videos 90% Smaller
MacX Video Converter Pro is able to shrink video file size on Mac by up to 90% smaller with maximum quality reserved. It lets you make videos shorter, remove unwanted parts to reduce video size without quality loss; or convert videos to smaller formats, tweak video settings, edit videos, and more.
How can You Make Videos Smaller on Mac
Method 1: Remove Unnecessary Parts
1. Split long videos: most direct way to reduce video size on Mac without quality loss - make your video shorter. You can cut a long video into small pieces. You can also remove the ads, advertising break, the beginning or ending of the video.
2. Remove unwanted parts: the video recorded may contain black bars or scenes that are not necessary. Deleting those parts will also make the video size smaller to a certain extent. In other words, you will need a tool that is capable to cut and crop, so that you can freely remove the blank or black space from the video scenes.
Method 2: Reduce Video File to Smaller Formats
Different video formats may vary distinctly in size and each format may excel others in special application. You can shrink video file size on Mac based on your needs. (if you don't want to bother, the H.264 or H.265 will be your best choice.)
1. Compress video for Email: the maximum size for most email services like Gmail, Outlook.com, Yahoo, AOL is around 25Mb, that's about a few minutes only. To reduce video to smallest size for email, WMV is a popular choice, which will provide relatively small size and good quality.
2. Downsize video files for Android/iOS: all the mobiles come with limited storage, and a 4K UHD movie can occupy most space. To decrease high space video to low space video for Android, iPhone iPad, H.264 MP4 will be the most suitable format. For newer devices, H.265 HEVC is suggested as it's half the size of H.264.
3. Reduce video size for YouTube/Whatsapp/web: each video-sharing site imposes different limits on the sizes and formats. First, if H.265 is supported, then go for it. Besides, FLV, AVI, WMV, MP4 are the most commonly used formats on web, and H.264 is the best recommend. To shrink video for YouTube, Whatsapp, Facebook, and others, select MP4 or FLV.
Method 3: Adjust Settings to Reduce Video File Size
Video size = bit rate * length. Beyond this equation, video size involves various video audio parameters. You can adjust those video settings to reduce video file size on Mac.
1. Bit rate. Bit rate is the number of pits that are processed in a given amount of time. Bit rate will directly affect the size. Higher bit rate means larger file size and better video quality, and lower bit rate refers to smaller file size but less quality. Lowering bit rates is an efficient way to shrink video size on Mac. To ensure good output quality, it's safe to lower the bit rate to one level below the original setting.
2. Resolution. Resolution refers to the number of pixels in an image, for example, SD 720 X 480, HD 1,920 X 1,080, 4k UHD 4096 x 2160 and 8K FUHD 7680 X 4320 pixels. The higher the resolution is, the larger the file size will be. To reduce the file size of 4k movies downloaded, or 4K clips recorded by cameras, you may need a video resolution converter.
3. Frame rate. The higher number of frames will bring smoother motion effect. Therefore, video in 60fps will result in higher video quality compared to 24fps. But the more frames will significantly increase the file size.
4. Sampling rate. Sampling rate is the number of samples of audio carried per second. The higher quality requires more samples. Simply put, the higher sampling rate will result in higher audio quality as well as the larger file size.
Best recommended video compression settings
Memory size, processing speed, colour palette all affect the video file size. For those who have trouble figuring out the most suitable settings to shrink/reduce video file size without losing quality, here we also suggest the best video settings for you.
| 4K UHD/HD 1080p video file size reduction | SD video file size compress |
|---|---|
| Format MP4 (file extension .mp4) | Format MP4 (file extension .mp4) |
| Video Codec: H264 (High profile) Frame Rate: 24, 25 or 30 (Constant) Frame Size / Resolution: 1280 x 720 (720p) Fields: Progressive Bitrate: 5,000 – 10,000 kbit/s |
Video Codec: H264 (Baseline profile) Frame Rate: 24, 25 or 30 (Constant) Frame Size / Resolution: 1024 x 576 Fields: Progressive Bitrate: 2,000 kbit/s |
| Audio Codec: AAC-LC Bitrate: 320 kbit/s Sample Rate: 44.100 OR 48,000 kHz (original sample rate) |
Audio Codec: AAC-LC Bitrate: 128 kbit/s Sample Rate: 44.100 OR 48,000 kHz (original sample rate) |
[97% Quality] Compress Videos to Smaller Size without Losing Quality
MacX Video Converter Pro - the most efficient movie file size reducer for Mac. It completely addresses the never-ending HD/UHD video size reducing prolem, and the poor output quality users may meet with other reducers.
- Easily compress 8K, 6K, 4K ultra HD, Full HD 1080P, HD 720P videos, no stuttering, jumpy or jerky processing;
- Its codec & parameters adjustment, editing features reduce video file size by up to 97%. (a 148MB 4K video is reduced to 3.58MB with no detectable quality loss);
- Unique 3-Level accelerations based on Intel QSV, Nvidia Cuda/NVENC, AMD APP GPU. It delivers 5x faster video compressing speed without CPU overheating or stuck problems compressing large 4K/HD videos.
- High Quality Engine is a guarantee to the compressed video quality. About 98% original quality can be reserved.
[Guide] How to Shrink Video File Size on Mac
Free download the video size reducer on Mac, or
Free download it on Windows PC
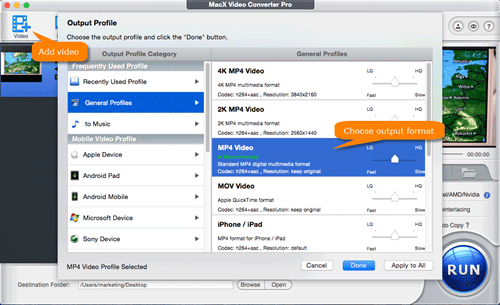
Step 1: Launch it and click "Add File" to load the video files. To decrease video file size:
First, select a smaller format to downsize video files from large-size formats: like H.264 to HEVC, MKV to MP4, FLV or WMV. To shrink video file size without losing quality, H.265 is the best choice; for better compatibility, H.264 is highly recommended. You can also choose YouTube, Facebook, Vimeo and it will convert the video to suitable size and quality;
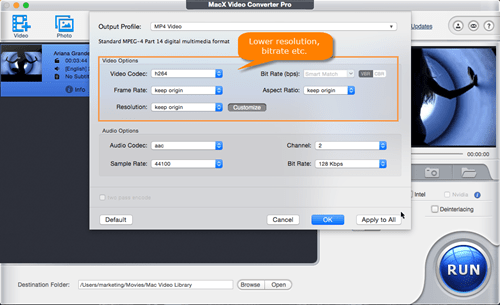
Then click the ![]() to enter into the video setting window. Shrink video file size by adjust the video settings: you can downsize UHD videos to HD files to get smaller size, lower the bit rates of the video and audio, adjust the frame rate or change resolutions from 1080P to 720P;
to enter into the video setting window. Shrink video file size by adjust the video settings: you can downsize UHD videos to HD files to get smaller size, lower the bit rates of the video and audio, adjust the frame rate or change resolutions from 1080P to 720P;
After that, click the Edit icon  to access the editing features. Here you can cut out unnecessary length can also reduce the video size, like unwatnted ads & commercials, black bars etc.

Step 2: Click the "Browse" button to set an output folder for the output video. To allow the fast speed compressing 4K/HD videos with the top video quality, do remember to check the Intel/Nvidia/AMD Encoder and High Quality Engine on the lower part of the interface. Then click the "RUN" button to start to reduce video size without losing quality.
How to Reduce Videos on Mac with Handbrake
The free video transcoder Handbrake also works as a video reducer for Mac. It comes with various settings to help make your videos smaller. First, free download Handbrake here. Run it and drag your videos into it. Then follow the steps to reduce movie file size on Mac for free.
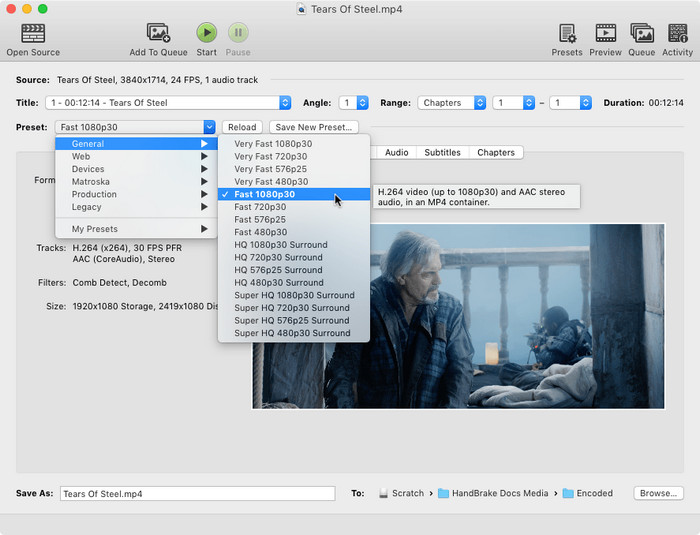
Step 1: Once the video is loaded, find Presets and open the dropdown menu. There are various ready profiles for Web, Devices, Matroska, and Production. To make the video size smaller, you can select a smaller profile, such as Web > Gmail at a lower resolution.
Step 2: Then click the Video tab, and select H.265 as the Video Codec. If the destination platforms won't support H.265 codec, then select H.264 as the output codec.
Step 3: Click Browse to select an output folder and click Start Encode on the top bar.
Video Compression Performance of MacX VS Handbrake
Why is MacX Video Converter Pro the best video size converter for Mac to make video file size smaller fast without losing quality? Below we have a simple comparison of the output sizes reduced by MacX Video Converter Pro and Handbrake.
- Source video: a 4min 29s 4K UHD video in MKV format;
- Output video: H.265 1080P @30fps, H.264 1080P @24fps, 1080P in MPEG4, FLV, WMV and AVI.
- Summary: Both video file reducers for Mac can convert the UHD video into smaller file with fast speed.
First, MacX Video Converter Pro is faster than Handbrake. For example, to shrink the raw 4K video to HEVC 1080P, Handbrake takes 7 minutes while MacX Video Converter Pro uses 2 minutes only. More importantly, MacX Video Converter Pro has a better compression ratio up to 1:28 when convert the MKV UHD into HEVC format, compared to 1:13 in Handbrake. It's hard to tell the quality differences using both video file reducers.

How to Reduce Movie Size on Mac with iMovie
You don't need a third-party tool to make your video files smaller on a Mac. With the built-in video editor iMovie, there is a simiple and free way to reduce video file size on Mac. It provides two methods: split a long and large videos into small pieces, and export the video to a file with smaller settings. Let's get started.
Step 1: Open iMovie and find Project. Click Create New > Movie and name it. Then click File to import the movie you'd like to shrink.
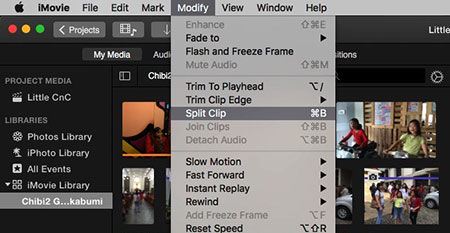
Step 2: Drag the clips into iMovie timeline and use your mouse to place the playhead to the first frame of the scene you want to split. Then click Modify in the main menu bar, and choose Split Clip. The video will be split into two pieces from where you place. You can also press Delete to remove any unwanted parts to shrink the video on Mac without losing quality.
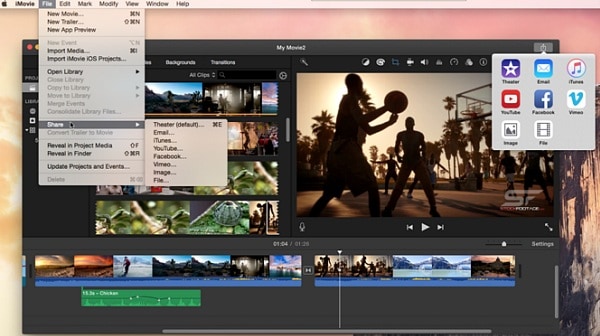
Step 3: Edit the video if needed. Then click the Share icon > select File. Then you can see different video compression settings with the output file size. Lower Resolution and Quality to make the final size smaller. For example, tweaking the resolution from 1920x1080 to 960 x540 can significantly reduce the file size. Then just click Save.
How to Shrink Video Size on Mac with QuickTime
The easiest way to make a video smaller on Mac is using Apple default media player for macOS. QuickTime Player has offered a way for quick and simple video size reduction on macOS.
Step 1: Launch QuickTime, then click File > Open File to load a video file you want to compress. Or you can do it by drag and drop.
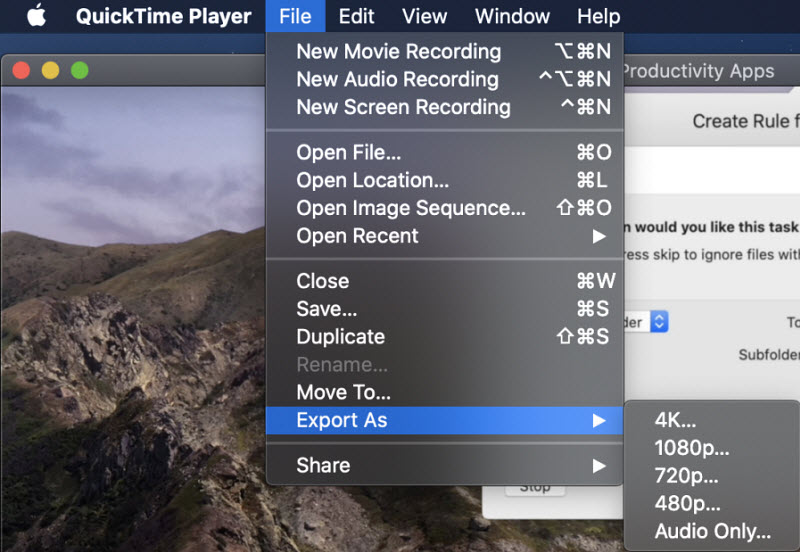
Step 2: Select File from the top menu bar and then select Export. QuickTime has options for 4K using H.264 or HEVC (H.265), 1080p using H.264 or HEVC (H.265), 720p using H.264, and 480p using H.264. Select a lower resolution. Note, if you're compressing a 4K video on Mac to 1080P, do remember to tick Use HEVC option. Then it will export the 4K video to 1080p HEVC for small size yet good quality.
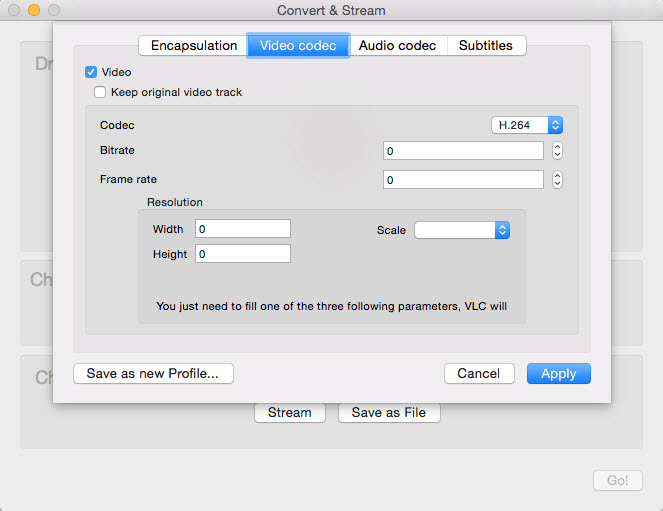
How to Reduce Video File Size on Mac with VLC
Don't be surprise that the famous free cross-platform media player VLC can also work as a Mac video size reducer. In addition to play video files of any kinds, it offers the abilities to make a video size smaller via video converting and parameters adjustment. Compared to video size reduction using Mac QuickTime, it has more options. If you don't have the app, download VLC here.
Step 1: Click File on the top bar, then select Convert/Stream. Then drag and drop the video to compress into it. Or click Open Media and load the video from your local Mac.
Step 2: In the "Choose Profile" section, select an output format. To reduce the video file size, select a small video format like H.264. If you don't know how to choose, VLC has profiles for different platforms like MPEG4 1080p TV/device, Video for MPEG4 720p TV/device. They are optimized in size and quality for TVs and mobiles.
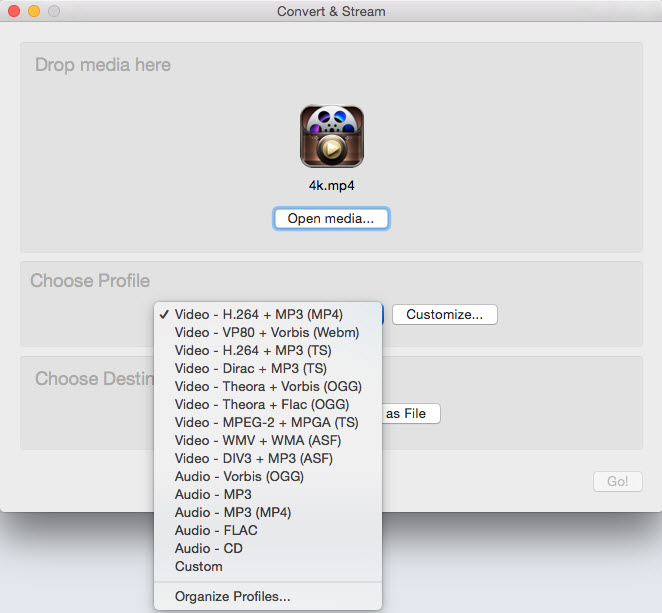
Step 3: To further shrink video size on Mac, click Customize to adjust the video settings. It allows you to set the bit rate, frame rate, resolutions, audio codec, and more. Then click Apply > Go.
